Hello once again! It’s time to get started with our photogrammetry project, and we’ll do so by taking our first pictures. But this time it’s not going to be about capturing the detail of the objects we want to scan – not yet. Instead, we are going to capture light!
This first step in our process, even before we start shooting at our desired target, is to capture the lighting conditions of the scene for later processing purposes. This will be very important later on, both for trying to recreate in a 3d computer program the exact illumination of the environment and for the correct creation of the 2d textures that we’ll apply to our models.
So let’s get out and take some pictures! This process can be quite fun, and given that I’m a student with a limited budget, it’ll be pretty easy for anyone that wants to learn to follow along without spending a lot of money. Here’s what I’ve used:
 / Nikon D3300 – borrowed from my girlfriend -, a nice camera and not very expensive.
/ A normal tripod – borrowed from the the uni that I’m currently studying at.
/ A chrome ball. That I bought, but it’s not anything like the expensive VFX spheres they advertise for big budget projects. In this case, and many others, you can get away with a normal gardening set, like the ones on the link below:
So as you see, it’s not very fancy or overly expensive!
Now that we have that, how do we proceed? Patience is a big friend at this moment, since we’ll have to take a lot of similar shots but changing the camera settings ever so slightly. The idea is to create a dome – or a sphere – of light data, and to do that we’ll need to point our camera in different directions so that we get a 360º arc. Patiently, and continuously, rotating the camera.
Further advice on that? Sure! First, shoot in RAW. Second, it’s a good thing to keep in mind that, when rotating the camera, you should have your pictures overlap each other so that you retain some information from the previous lot of pictures into the next. Also, try shooting with a low ISO, preferably at 100, so noise from the camera is not a concern. A high f number is also desirable, since you get more detail out of your scene. Finally, try varying the shutter speed for your different needed exposures, and maybe 5 to 7 different settings would be ideal for every direction you are taking your pictures. Remember though, just stick with your chosen number!
Once we are done with the shooting, it’s time to put our computers to some hard work. We’ll need to do a couple of things: merge the files into a 32 bit file for every direction the camera is facing, and then stitching them together to create the dome of light.

The first step can be done in a program like Photoshop, which has a nice built-in function to combine pictures from different exposures. But since we’ll be doing that a lot, I’ve found over the internet a nice link to a script that will greatly speed up the process: it’s called Batch HDR merging, and you can find it below.
Handling the utility isn’t difficult, and in no time you’ll find yourself with the batched HDRs for every direction you shot. Next step, making a panorama out of them.
We could still use Photoshop for that same process, but just for the sake of trying something new, let’s go with PTGui. It’s got a trial version with all the functionalities included, so we can use that to try it out.
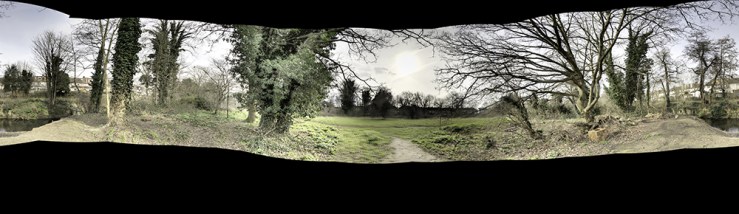
Once in there, it’s a pretty straightforward process: load the images by selecting the folder they are in, press the ‘align them’ button, tweak the settings that the program has created for you – if need be -, and finally create the panorama. And there you go! There are some tabs to be aware of inside that program, but checking them out is easy and they are self explanatory. You might want to choose in the ‘Panorama settings’ a Equirectangular projection, as it comes in handy in 3d applications like Max oy Maya, but other than that you should be all set.
So that’s it! I won’t say that it’s a very simple or obvious task, as it takes a lot of time to shoot the pictures, but once you get the hang of it you’ll probably start to like it. Of course, ‘getting the hang of it’ could take you up to a lot of time, specially if you are new like I was to the whole process. Nevertheless, it’s a really cool asset for your 3d scenes, and it adds that extra realism that it’s not easy to find with other methods.
Again, hope you found it interesting and that it helps you with your own creations. If you need any extra info about anything covered in here, don’t hesitate to leave a comment below!
Cheers!
