Hi and welcome back!
On this very first blog entry about real-time archviz, we are going to start talking about those things we have to consider when transferring our work from a 3d application into a game engine. It doesn’t really matter which software you use for modelling and texturing, since the process we are about to cover is something that every 3d app handles. Having said so, let’s start bringing our buildings to life!
1 modelling principles / 2 uv mapping / 3 pivot / 4 materials / 5 exporting
1/ Modelling principles
Before we export anything into the real-time render engine, we need to prepare that geometry to be exported. As you begin this exercise, you might want to create something from scratch or maybe you already have an existing building that you’d like to use for this tutorial. Having said so, let’s consider a couple of things: are we going to start modelling or do we already have our models ready?
1a/ Modelling from scratch
If we are modelling something new, we should probably take into consideration a couple of things. First, keep your models with a clean geometry. That sentence, which has been constantly repeated in the 3d artist community, is a must when dealing with game engines. There are many reasons behind this, but for now it’s important to know that when we export our models into real-time engines the faces of the meshes will need to be triangulated.
That means that every face will eventually be a triangle. When we model, it’s usually best to do so in quads, as in faces that have four sides. We can also model in triangles, something not very usual, or you can use them to help your quad geometry – something that happens more often.
Adhering to that simple rule will make exporting your models a much easier task than if you have n-faced polygons in your meshes. And talking about polygons with more than 4 sides, keep in mind that strange artifacts can occur if you import that kind of geometry.
1b/ Preparing an existing model
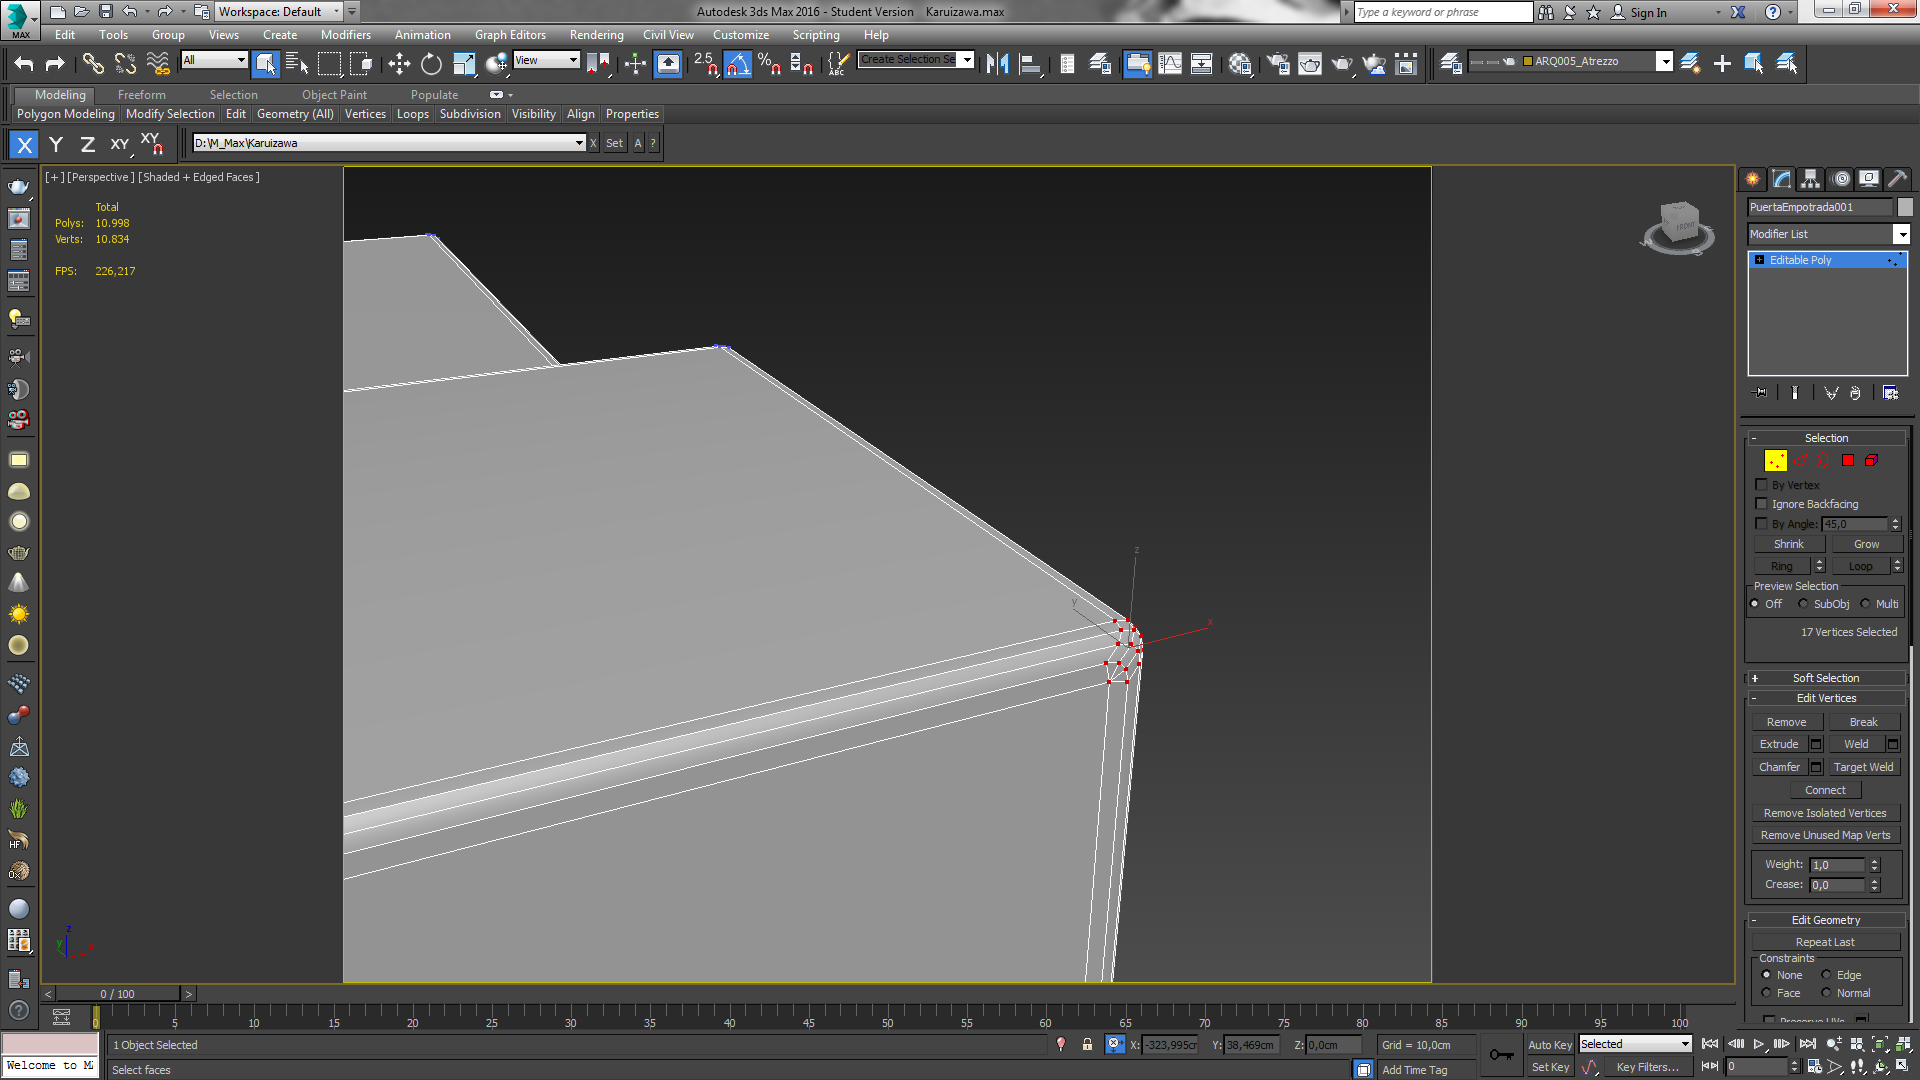
If you already have some models that you want to import for this exercise, there are some things you should check before going any further. At this stage, let’s make sure that you model is built from quads or triangles, and not something else.
The only thing you should do if you have an existing model is to triangulate it. In 3DS Max, you can do this by converting the mesh to an editable poly (right-click > convert to… > editable poly). In Maya, you can triangulate it by going to mesh > triangulate.
Even though that previous step might seem simple – and frankly, it could be overlooked at all since the real-time engine can automatically triangulate your meshes -, it is something that can help you discover errors in your mesh, specially if you are starting to model. Say, for example, that you have a model which has faces with 5, 6, 7 or more sides. Triangulating it will let you see how it will look once you are on the Unreal Engine, saving you some time in case you need to do some adjustments.


2/ UV mapping
The second part of the process is to unwrap the model. It is an important step in order to texture the mesh, but it is even more vital for the render engine, which has to calculate the lighting inside Unreal Engine. An incorrect unwrapping of the 3d object – ie, overlapped faces -, will result in a lighting error, which will spoil your scene and could crash the program.
For this example, we are going to cover two methods of unwrapping: inside Max and Maya, and an automatic unwrapping in zBrush.
2a/ Unwrapping in 3DS Max or Maya
Unwrapping in Max or Maya means classical unwrapping. This will have you do lots of stitching, vertex welding, breaking faces… something that if it doesn’t sound familiar, don’t fret! It’s not as bad as it sounds, and there is a really easy way to unwrap in no time.
Before we begin, how much time do you want to spend on this step? Automatic unwrapping in Max and Maya can happen almost instantaneously, but it has its flaws. If you want to unwrap as perfect as possible, it can be done – but it will take you some extra time, sometimes as much as modelling itself.
Automatic in Max or Maya: First, open the UV editor. Once in there, all you have to do is head over to Mapping > Flatten mapping. A similar approach can be done in Maya, by going to the ‘unfold’ option inside the UV editor. This method will ensure that you have a UV map where the faces of your model don’t overlap, letting you use it in Unreal Engine with no problem. The main inconvenient is that the default settings will unfold the UV map in such a way that you will have multiple seams, or edges that are the same but are placed apart from each other. When working with small scenes, having multiple seams can be ok. But as our scenes grow larger, having more seams can actually lower the fps count, so it’s a good thing to have clean UV maps if we are working with geometry heavy environments. And that’s something that usually happens on archviz projects!
Manual unwrapping in Max or Maya: this method has you manually working with UVs, and placing them in the order that you deem fit. By doing this, you can actually have very few seams, even though it will take you some time to organize the map.


2b/ Automatic unwrap in zBrush
One of my favourite things to do, whenever it is possible, is to take an object I’m modelling and export it to zBrush for unwrapping. The unwrapping tools in zBrush are quite powerful and they work well, even though they won’t usually solve all of your UV-related problems. Here’s a list of how they work best for me:
– They are great for objects where you don’t need to refine the UVs: Sometimes, you might find that you only need to unwrap an object just for the light-mass in Unreal Engine to work. You are not going to texture that mesh, you are just going to apply a simple material to it. On those cases, using zBrush’s unwrap will be an enormous tool for you, since that will be all you need to do.
– They are also great for any other object, but you might need to refine a little bit: For pretty much everything else, zBrush’s unwrapping is also great. BUT more often than not, some kind of refinement is needed with the default UV map – a little bit of vertex tweaking, some rearrangement of the faces… you will need to head back to Max or Maya for some polishing, but zBrush has already saved you lots of time.


3/ Pivot
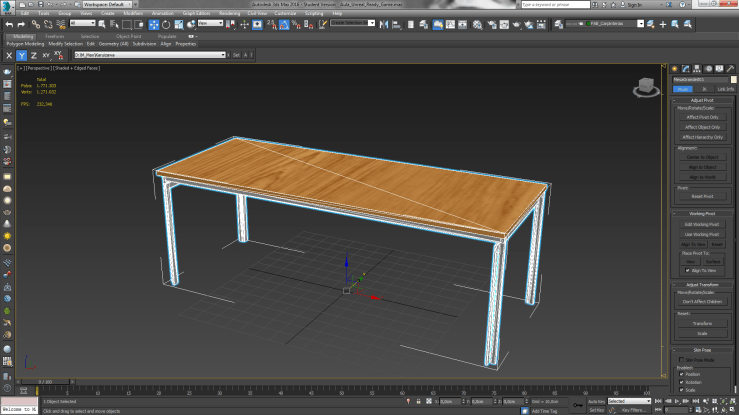
For us to be able to control the mesh in a real-time render engine, the position of its pivot has to be carefully placed. In Max or Maya, you can control where to place it, but it will usually be centered on the object or at its base. In spite of this, if the mesh isn’t at the centre of origin of the 3d app when we export it, once we try to move it on the Unreal Engine we will find that the pivot is somewhere we don’t want it to be.
In order to get around this problem, not only do we have to place the object’s pivot wherever we want it to be, but we must also bring the object to the 0,0,0 space coordinate. Doing so will result in correctly imported mesh, allowing to move the object just like in our modelling software of choice.
4/ Materials
When working outside of Unreal Engine, you might be used to some render engines that use certain types of materials. Mental Ray, VRay, Octane… most of them usually come with their own materials, which work best in their respective engines. Having said so, we have to be aware that Unreal Engine handles shaders and textures in a different way that those softwares mentioned before, so exporting materials can be a bit tricky.
Right from the start, we have to be aware that only standard materials will translate from an application like Max or Maya to Unreal. And even in that case, not all of the textures will be exported as a result: only the diffuse and sometimes the bump maps will be correctly exported.
With that in mind, at this point of the tutorial I wouldn’t worry too much about materials – we’ll cover them in due course. But for the time being, and just for the sake of using them, keep in mind that standard materials might come in handy whenever you want to quickly export a texture for the diffuse slot.
5/ Exporting
Final part! The exporting process is quite simple between Max or Maya and into Unreal. Here are the basics:
– Select the objects that you want to export and move them to the 0,0,0 coordinate.
– Before going any further, check their UV’s and make sure there are no overlapping faces.
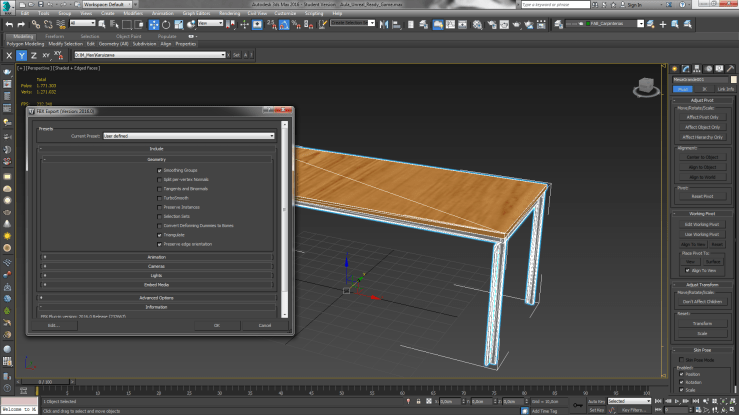
– Go to ‘export selection’ and name the model. Select the fbx file format, and in the geometry options section tick the boxes that apply to your mesh. Smoothing groups is almost usually a must, as is the ‘preserve edge orientation’ option. You can click on triangulate, which will do just that if you haven’t done so before – but beware of the possible problems we talked about at the modelling stage !. It is a nice option to have active though, as it will triangulate anything you might have forgotten. The other options are mostly used in particular cases, not really necessary for what we are talking about here.
And that’s it for this week! Now that we’ve covered quite a lot on the transferring geometry from a 3d app to a real-time render engine, we’ll come again at it next week to import it into Unreal Engine and start working there. It’s going to be fun!
See you next week, cheers!
Brais
